7 Steps to Improve Your Facebook EdgeRank and Dominate Facebook
- Find out your Edgerank: Visit the unofficial Edgerank Checker to verify each of your pages Edgerank Score.
- Post more Videos & Pictures: Not only do they grab people’s attention compared to the standard text updates; they also seem to be highly favoured by the Edgerank algorithm.
- Encourage Commenting: Bear in mind that when you create content, your main goal is to encourage interaction. So, make sure to ASK for comments, feedbacks and even “likes” (something is better than nothing).
- Interact With Your Audience: Interact with your audience more frequently. When they see that you actually reply to their comments, they’re more likely to engage. Don’t forget to do a Crowd Source for content ideas. Not only will the content resonate with your audience, they’ll definitely appreciate being included in the creation process.
- Ask the Questions: The best way to engage with your audience is to ask them questions. You will be surprised how many of them will answer you. The key is to make sure you have a call to action. So, Ask and you shall receive.
- Watch Your Timing: Now that you have a targeted, engaged audience, the last thing you want to do is blow it by posting too many updates. Unfortunately, there is no magic formula. The frequency of your updates will depend on your audience. Start smaller (3 updates per week to once a day), and work your way up to the “sweet spot”.
- Personality: When engaging with your audience, feel free to let your personality flow through. The last thing you want is for your audience to feel like they’re talking to a machine.
Who To keep facebook clean
Regards,
Lazy Goys Blog
Be Secure On Facebook
Facebook Secure Browsing
Facebook allows users to browse Facebook over asecure https connection, which will add added security to your Facebook account. The feature is not enabled by default, but you can change it in your Facebook settings easily.
Go to facebook.com/editaccount.php and visit the Account Security details. Look for the Secure browsing option – “Choose Browse Facebook on a secure connection (https) whenever possible”, tick the checkbox and Save.

Next time you visit Facebook, look for the secure icon on the browser location bar and the https url instead of the http url.
Why doesn’t Facebook enable Secure browsing by default for all users? Well firstly the page loading speed is much slower over a secure connection. Secondly, not all Facebook apps will support secure https connections, so they will not work.
Regards,
Lazy Goys Blog
10 Chrome Extensions to Make your Google+ Experience Better
Google+ is gaining momentum in a rapid manner and we have already seen that it has crossed 10 million users. We have shared many articles on how to get best out of your Google+. Here is a list of useful extensions for Google Chrome which can improve the networking experience on Google+. Although there are numerous extensions available, we have only picked the ones which suits the best from a user perspective.
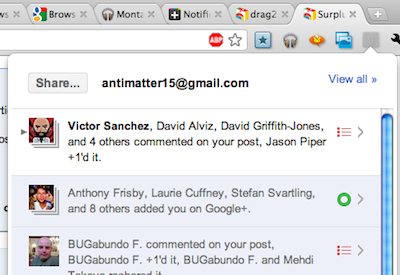
1. Surplus: This extension adds Google+ to a pop up window, so you don’t have to open the browser to view or comment on any posts.
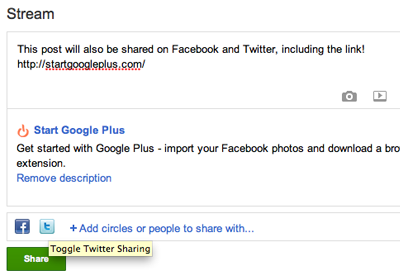
2. Start G+: We have already review this extension on this blog and it helps you to share your articles onTwitter and Facebook directly from Google+ post interface. You can check out our review of Start G+.
3. Photo Zoom: Since Picasa is integrated into Google+, you can share images from your albums. Photo Zoom is a simple extension providing fast and simple zooming for photos within your Google+ Stream.
Just hover over the image you wish to zoom and +Photo Zoom will load the enlarged version of the picture.
Just hover over the image you wish to zoom and +Photo Zoom will load the enlarged version of the picture.

4. G+ Extended: Keyboard shortcuts are always handy to improve your productivity and this extension does the same job. It provides you with extra keyboard shortcuts to make the best use of Google+.
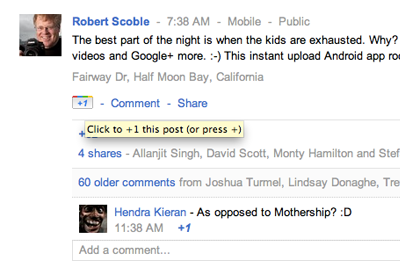
5. Comments Toggle: Some of the post shared on Google+ might have long list of comments and you actually might not be interested in that thread. Comments Toggle will hide the comments and you can view it by togging it from the interface. You can also try out Google + Comments extension which does the same job.
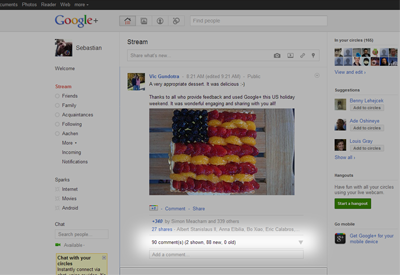
6. Usability Boost for Google Plus: This extension will add some useful CSS styling to Google+ interface by grouping each post into a section along with its comments.

7. Share+ Social Buttons: Found an interesting article on Google+ and want to share it on other social networks, then you can try out Share+ Social Buttons for Google+.

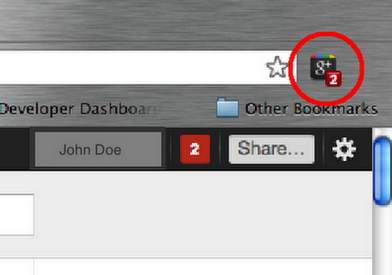
8. Notification Count: This extension shows the number of new notifications you have received on your Google+ on the top navigational bar without having to open the Google+ account. When you click on the notification button, it actually takes you to your account.
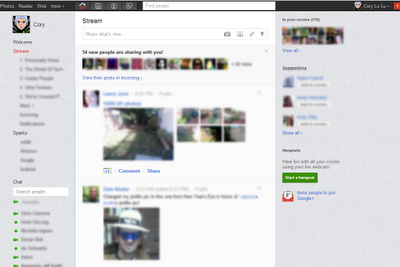
9. Google+ Ultimate: This extension is ported from an userstyle and it can remove certain elements from your Google+ account when you view it on Chrome.
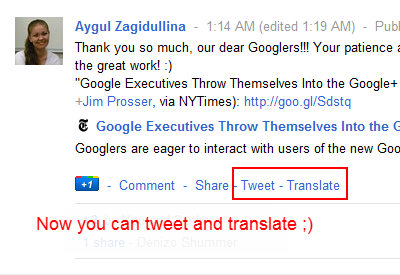
10. Helper for Google+: This extension adds two links to all the posts in Google+- one to tweet the post and second to transalate. In case you have seen a popular update in other languages, you can easily translate it using Google translate.
Apart from these extension, you can also try out Reply and More extension (helpful to mention somebody in the post), Twitter and Facebook inside Google+ and also make Google+ look like Facebook. There are new extensions added every day, so we will update the post if you find a useful extension. Please do share it in comments.
Regards,
Lazy Goys Blog
Backup Data to Amazon Cloud Drive
Amazon Cloud Drive is a web storage application unveiled by Amazon less than a month ago. It provides users with 5 gigabytes of storage space by default for free. Users can buy more storage space anytime as per the needs. Amazon is also promoting the Amazon Cloud Drive heavily. It is on the Amazon home page and it is hard to miss. You can use this free space to backup data to Cloud Drive.

This article will show a way to backup local folders and files to Amazon Cloud Drive.
First of all, you will need to click through the Amazon Cloud Drive link on Amazon.com and sign up for it. After that, you will also need to upload your first file using the Amazon Cloud Drive web interface. During the first upload, you will need to accept an end user agreement about the upload policy.
After that, download the Gladinet Cloud Desktop from http://www.gladinet.com and install it. If you have a 32-bit system, you can use the 32-bit installer package, otherwise, use the 64-bit package.
During the install or after the install, you can mount Amazon Cloud Drive as a virtual directory.

After that, Amazon Cloud Drive will show up under the Z: drive – My Gladinet Drive
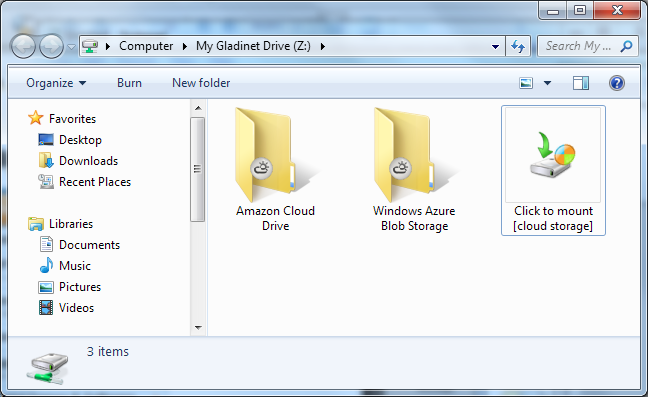
Now there are several ways to do backup.
Method #1 – Drag and drop from local folder to Amazon Cloud Drive folder
When you do drag and drop, a dialog will show up.

By default this is a one-time copy event, however, you can change the drop down to turn it into a daily backup or automatic backup when change happens.
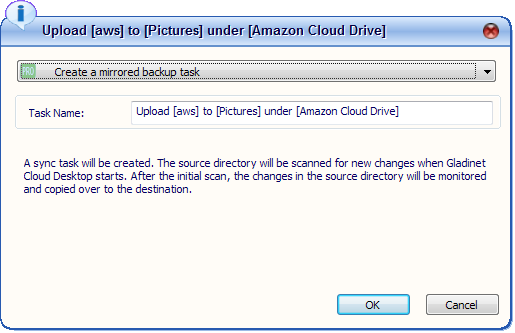
Method #2 – Using the Management Console

Using the Management Console, you can create mirrored backup or snapshot backup.
Mirrored backup is a simple mode of backup. What it does is simply mirroring a local folder to Amazon Cloud Drive. By default, a delete action in local folder will not be mirrored in the cloud drive so to protect against accidental deletion. There is an option in the settings that you can override that so delete is mirrored too.
Snapshot backup is a more advanced mode of backup. It will create full snapshots periodically like every 30 days and in between, there are incremental snapshots.
The steps are similar for both modes of backups.
First you select a source folder.
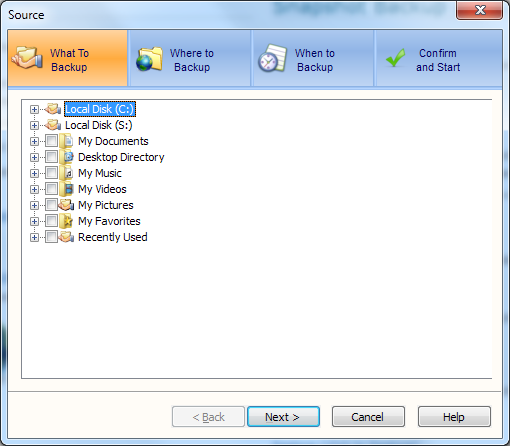
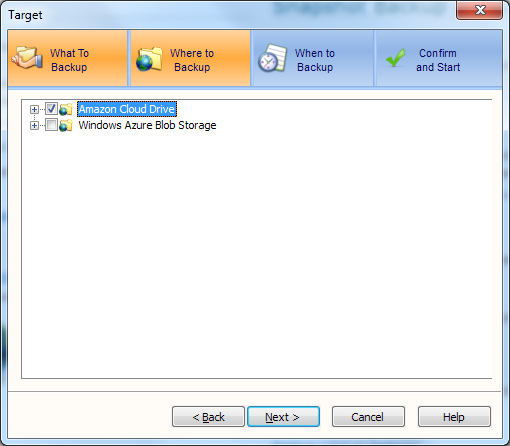
The next step will select the destination, such as Amazon Cloud Drive
Then select the backup schedule.
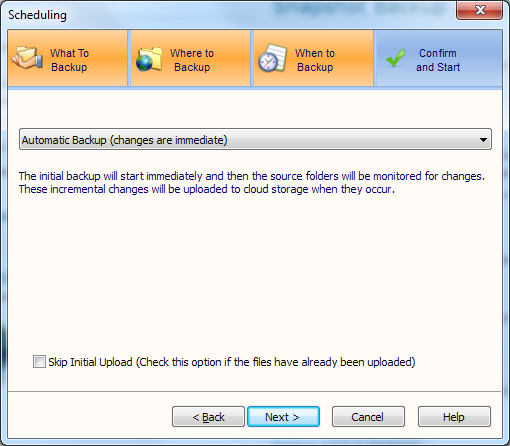
The last step will be reviewing the backup task and confirm.
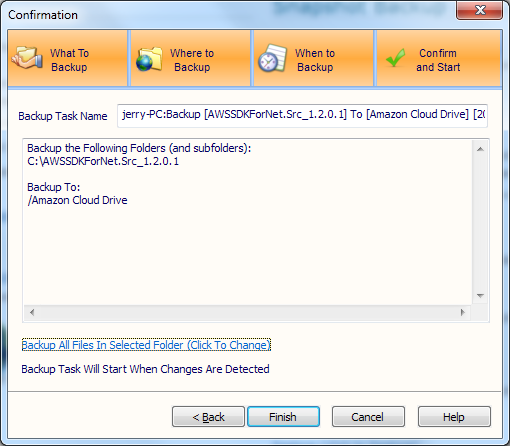
Now the backup task will run in the background and backup the local source folder to Amazon Cloud Drive.
Stay Connected With Us @ Useing RSS Feed, Twitter,Facebook
Regards,
Lazy Goys Blog
The Best Video Player for Mac
The Mac offers a few options for video players, and all of them are pretty great, but VLC still gets the gold medal for video playback because it just works better than the competition.

- Plays practically any media file you can throw at it
- Very fast
- It works on practically every platform, so if you like it on Mac you can download a version for pretty much any other OS you use
- Converts and streams media
- Robust subtitle support
- Ability to boost the audio signal considerably
- Video filters, like de-interlacing and cropping, for customized playback
- Compensates for slow computers pretty well
- Create media playlists
- Tons of customizable keyboard shortcuts
- Great for playing content over the network
- Built-in audio equalizer
For a full list of features, go here.

VLC is a fast video player that plays just about any media file you can throw at it. That's really all you need to know. If you want to play a movie, you drop it in VLC and it'll be playing in seconds. It has a playlist feature if you want to play multiple files. You can adjust the image to brighten it up, crop it, or do pretty much whatever you need to make it work best on your computer. While VLC is a complex application, when it comes to video playback there's really nothing that handles the task quite as well.

VLC is far from perfect. While its video playback features are very good, everything else is a little convoluted. Figuring out even the simplest of features, like the Media Library, is complicated if you don't know what you're doing. The streaming media and video conversion features are also not very new user-friendly. To get into VLC's more advanced features you need to be prepared to spend some time with the manual. It makes for a great video player, but when it comes to its other features you should expect to encounter at least a little frustration.

There is a lot of competition, and much of it does many things better than VLC. The problem is that the competition just doesn't work as well when it comes to the simple task of video playback. As much as we'd like to recommend something other than VLC, as VLC has long been king of the hill, these applications still have some work to do before they take the title.
MPlayerX has long been the main competitor to VLC and it's a very good video player. The main downside is that it can get pretty laggy and out of sync with video when it can't keep up for one reason or another. It has a great interface that's very similar to Quicktime Player X and is very easy to use, but sometimes falters in its main task: playing video.
Movist is like the hybrid child of VLC and MPlayerX, which makes it a very attractive option. It makes for a great video player in theory, but in our experience its been a bit slower and buggier than other options. We do hope that through Movist's development it continues to improve and can one day trump VLC.
Perian and Quicktime Player is the simplest combination you can use. Quicktime Player is really a very good, simple movie player and Perian adds support for pretty much every media file VLC can handle. The major downside is that Perian needs to buffer the file before it can play it. When you play something in VLC, it just plays. Nonetheless, if you really like Quicktime Player but need wider format support, this is the way to go.
Lifehacker's App Directory is a new and growing directory of recommendations for the best applications and tools in a number of given categories. This week, we're focusing on video players.
Regards,
Lazy Goys Blog
How to Convert PDF to Doc or Text using Google Docs
Most of the time when you share documents, we use PDF, which is the most commonly used format when sharing. Unless you have an editor, you cannot edit PDF files. If you want to edit documents, the best format is doc or text. There are many PDF to Word converters, but the one of the best free tools is to use Google Docs to convert PDF files to Word or text format. Optical Character Recognition (OCR) feature of Google Docs lets you convert images with text into text documents. Images can be processed individually (.jpg, .png, and .gif files) or in multi-page PDF documents (.pdf).
How to Convert PDF to Doc or Text using Google Docs
Firstly you need to upload the PDF file or Image file you want to convert, open the Google Docs file upload interface.
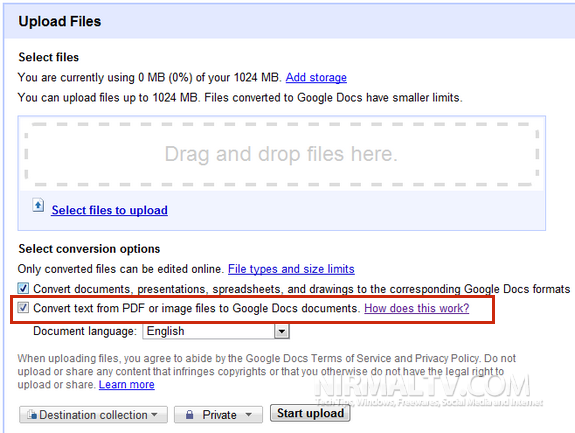
Select the file from your PC and check the box against “Convert text from PDF or Image files”. Click on the start upload button. Once the upload is completed, you can open the file in Google docs. You might see a note that not all formatting are retained while converting from PDF or Image to Doc.
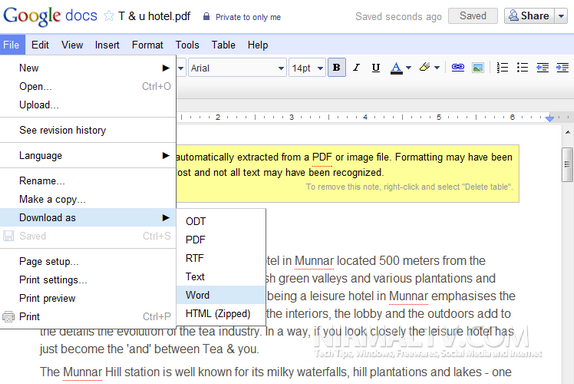
You can add you own formatting and then select the file menu-> Download as-> Word. This will save the document in Word file on to your desktop.
File size limitations
The maximum size for images (.jpg, .gif, .png) and PDF files (.pdf) is 2 MB. For PDF files, it only looks at the first 10 pages when searching for text to extract.
Regards,
Lazy Goys Blog
Rapidshare Life Time Free Use Premium Account
UNLIMITED download/upload Its very easy to fool RapidShare server if your IP address is assigned by your ISP.
Just follow these simple steps:
Clean up IE or netscape or Firefox cookie( In this case the one that belong to rapidshare website)
On Command prompt (open MS-DOS)
type -----> ipconfig /flushdns <---Enter
type -----> ipconfig /release <---Enter
type -----> ipconfig /renew <---Enter
type -----> exit <--------Enter
Or save these commands in a bat file and run it everytime you need to fool Rapidshare server. Remember to clean up rapidshare cookie in your temp Internet files folder.
Now you should be ready to download/upload as many files as you want from their server.
another way, get proxies from the internet and apply to the browser.
some of proxies might not work though...
Note:
If you are on a LAN and behind a router (using NAT, for example)---this will not work.
If you use a fixed proxy--- this will not work.
If you have a fixed IP address from your ISP or college or employer or whatever -- this will not work.
If you happen to get the same IP address from your DHCP server because it's assigned to you -- this will not work
No waiting
THIS "cheat" for RAPIDSHARE DOWNLOADS eliminates the "WAITING" for the file. No more COUNTDOWNS. So heres what you do:
1. First, Find a rapidshare download.
2. Hit the FREE BUTTON, like always.
3. While your waiting for it to countdown, change the URL in the bar to:
Code:
java script:c(countdown = 0);
and hit ENTER or the GO button over and over. Eachtime you do so, it decreases 10-20 seconds. Few times and the link appears.
or you can simply do the code below ONCE
java script: for (i=0; i<30; i++) { c(); }
Regards,
Lazy Goys Blog


